Painting professionals know the secret to a long-lasting, professional-looking finish is superior surface preparation. Whether you’re looking to spruce up a single room or an entire commercial property, quality prep ensures durability and adhesion.
The SVT process – sand, vacuum, and tack – prepares the surfaces for a fresh coat of paint. It’s important to choose a high-quality primer that promotes adhesion and prevents wood tannins from bleeding through. Contact Cabinet Refinishing Sacramento for more information.
Preparation
A variety of surface preparation techniques can be applied to a wide range of materials ahead of coating, welding and other processes. These can vary from hand cleaning to more complete industrial-grade abrasive blasting or dry media grinding techniques. The goal is to create a clean, uniform surface that provides a good mechanical key for adhesive bonding. This is often necessary for a smooth, long-lasting finish.
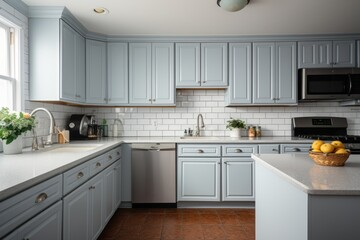
When painting cabinets, careful surface prep is the unsung hero of the project. This step prepares the cabinet surfaces to receive a new coat of paint, ensuring that it adheres and covers evenly for a beautiful, durable finish. It involves thorough cleaning, light sanding and priming to ensure that the paint is able to grip the surface for a lasting finish.
Begin by removing any hardware from the cabinets, then cleaning thoroughly with a degreaser to remove grease and grime. Lightly sand all surfaces, then use a tack cloth to remove any dust left behind. Then, prime all surfaces with a high-quality product like KILZ 3(r) Premium Primer. This primer offers excellent adhesion, stain resistance and dries quickly.
Choosing your cabinet paint color and style is the next step. Choose a durable latex or oil-based product that matches the look you’re going for. Be sure to test your chosen color on a small part of the cabinet or door for color and quality, and use drop cloths and masking tape to protect nearby surfaces.
If you’re looking for a super-smooth finish, consider using a spray gun. This is how the pros do it, and while it requires more setup and gear than regular paint, it’s the best option for a smooth, even coat that eliminates brush strokes.
Another option is veneering. This is a great option for homeowners who want to give their cabinets a whole new look without sanding or repainting them. It’s more expensive than painting, but far less than a full remodel. It’s also not limited to wood, so you can get a premium look with laminate or other material.
Primer
While it’s tempting to skip this step, a primer is the foundation of any painting job. Cabinets are especially prone to chipping, flaking, and peeling, so using a good primer is essential to creating a sturdy base. Primers create a bond between the cabinet surface and the paint to make sure the finish sticks and stays put.
In addition to promoting adhesion, the right primer also helps prevent stains and wood tannins from bleeding through the topcoat. Choose a stain blocking primer like Zinsser B-I-N Shellac Primer to get the best results. This primer works well on glossy surfaces and is formulated to block odors, seal stains, and resist moisture.
Before applying the primer, lightly scuff-sand the cabinets to remove any rough spots and imperfections. Once the sanding is complete, vacuum and tack cloth the surfaces to remove any dust or debris and create a clean, smooth canvas for your final coats. Once the primer is dry, scuff-sand again to promote adhesion and eliminate any bumps or unevenness.
Cabinet paint is specially formulated to withstand the normal wear and tear of cabinets, so it’s important that you use a high-quality product that is designed for your cabinet type. For example, oil-based paints work well on wooden surfaces while water-based paints are perfect for metal finishes. It’s also a good idea to use low VOC (Volatile Organic Compound) paints, as they are better for the environment and your health.
Once you’ve chosen the right paint for your project, apply it using a brush or roller in a dust-free environment. Be sure to follow the manufacturer’s application instructions for proper drying and curing times to ensure a long-lasting finish.
If you want to add a final touch of style to your cabinetry, consider replacing the hardware. Decorative handles and knobs are available in a variety of styles and colors, so you can find the perfect accent for your home. For convenience, you can also opt for pulls, which are ideal for drawers and are easy to grip.
Paint
Depending on their condition, cabinet surfaces can benefit from either an oil or latex paint. Both types of coatings have their strengths, but the right product can be key to a long-lasting and visually stunning result. Regardless of the chosen finish, it’s important to select a high-quality primer that enhances adhesion and prevents stains from bleeding through the new paint. A stain-blocking product, such as KILZ 3 Premium Primer, is a great choice for this step.
Once the primer is dry, it’s time to begin painting! Be sure to apply even coats and follow the manufacturer’s instructions for proper curing. During the paint job, it’s also a good idea to update any hardware that needs attention. For example, if you decide to swap out your knobs and pulls for something fresher, use KILZ ORIGINAL Aerosol to prime the metal hardware before applying BEHR PREMIUM Metallic Spray Paint for a rich and lustrous finish.
While cabinet refinishing may seem like a daunting task, it can be simple and rewarding with the right preparation and tools. Professionals know the best techniques to optimize a paint job’s appearance and durability. This is what sets them apart from DIYers, who often overlook critical steps in the process and end up with disappointing results.
Before beginning the refinishing process, it’s important to remove all doors and drawers from cabinets and label each piece so it can be reinstalled in the correct place when the project is complete. This will make reassembly much easier down the road. It’s also a good idea to clean all surfaces with a degreaser, such as trisodium phosphate (TSP), to remove grease and grime buildup.
Thorough cleaning and sanding will give you the smoothest surface possible, helping the paint adhere and last longer. In the end, this will ensure that your kitchen is bright, beautiful and inviting for years to come. When choosing a professional for this task, it’s crucial to consider their expertise and dedication to quality work. The best painters take their time, thoroughly assess each surface and its condition, and only use the highest-quality materials to deliver results that will stand the test of time.
Sealing
Cabinet refinishing is a complex process that requires precision and patience to achieve a professional result. It’s important to use high-quality brushes or sprayers for even coverage and allow each coat to dry completely before applying the next. The final step involves sealing the cabinets with a clear protective finish to enhance durability and protect against moisture, scratches, and daily wear and tear.
Unlike cabinet replacement, the refinishing process is minimally disruptive to your home life. It’s also a more cost-effective and environmentally responsible option, preserving your existing materials while minimizing waste and the energy required to manufacture new components.
Surface Preparation
Sanding is the first step in preparing your cabinet surfaces for refinishing. You can sand the entire surface or simply scuff it lightly to improve adhesion and provide a smooth texture. After sanding, you should vacuum and tack the area to remove any remaining dust particles.
After sanding, you should apply a high-quality primer like KILZ 3(r) Premium Primer to prepare your cabinet surfaces for paint. A primer with stain-blocking properties helps ensure the topcoat will adhere properly and prevent bleed or peeling. Choose a primer that dries quickly and has low odor, so you can remain in your home during the refinishing process.
Once your primer is fully cured, you’re ready to start the painting process. It’s recommended to apply multiple thin coats rather than one thick layer. Thin coats are easier to brush over and can minimize the appearance of brush marks, while also providing a more durable finish. During the application process, be sure to work with the grain of the wood to avoid creating visible lines and ensure a consistent, uniform look.
Sealing
Once the paint is completely dry, you can apply a clear varnish to enhance the look and durability of your cabinets. A water-based polyurethane sealer is a great choice for kitchen cabinets because it resists moisture and scratches and maintains a beautiful sheen that’s easy to clean.
Choosing a refinishing company with experience and a solid reputation in the local community is essential for achieving a quality result. Look for a reputable company that offers free estimates and competitive prices. They should also be able to answer any questions you have about the refinishing process and the benefits of selecting a particular product or technique.